Understanding the Basics of Chip Repair
What Is Chip Repair?
Chip repair refers to the process of fixing small chips or cracks in a vehicle’s windshield or other glass surfaces. These imperfections can arise from various factors, including road debris, temperature fluctuations, or even poor installation of windshields. Repairing these chips promptly is crucial to restore the structural integrity of the glass and ensure clear visibility for the driver. By utilizing specialized resins and tools designed for the purpose, automotive specialists can effectively fill in these imperfections, preventing them from expanding into more severe damage. When it comes to ensuring your vehicle’s safety, understanding the necessity of Chip repair is a vital first step.
Importance of Timely Repairs
The significance of addressing windshield chips cannot be overstated. A small chip may seem inconsequential at first, but it can easily develop into a large crack, making the windshield more vulnerable and potentially requiring a full replacement. Early intervention not only saves the hassle and expense of dealing with larger repairs but also maintains driver safety. Cracks that obstruct the driver’s view can reduce visibility, which increases the likelihood of accidents. Timely repairs can also save on insurance costs, as many policies cover minor chip repairs without a deductible if handled promptly.
Common Causes of Windshield Chips
Windshield chips can occur due to various environmental and operational factors. Road debris, such as gravel or stones flung up by other vehicles, is a leading cause. Additionally, temperature changes can lead to stress on the glass, causing small fractures to form. Poor installation of glass or pre-existing weaknesses in the windshield can also contribute to chip formation. Understanding these causes is essential for vehicle owners to take proactive steps to protect their windshields from damage.
Identifying Different Types of Chips
Types of Windshield Chips Explained
Windshield chips come in several distinct types, each requiring specific approaches for repair:
- Star Break: This type resembles a star shape with multiple cracks emanating from a central point. It is one of the more challenging types to repair due to its complexity.
- Half-Moon Chip: Characterized by a semi-circular fracture, this chip is more straightforward to repair than a star break.
- Linear or Crack Chip: A single line crack that can stretch several inches. While repair is possible, extensive cracks may necessitate windshield replacement.
- Bull’s Eye Chip: A circular chip that forms a “bull’s eye” pattern, which is generally easier to repair compared to other types.
How to Assess Chip Damage
Assessing the damage to your windshield should begin with a thorough visual inspection. Automotive professionals often use specialized tools, including magnifying glasses and bright lights, to identify the severity and type of chip. Key factors to consider include the size of the chip, depth, location, and the distance from the driver’s line of sight. In general, chips smaller than a quarter can often be repaired, while larger or more complex chips may require further evaluation.
Tools Required for Chip Repair
A successful chip repair involves specific tools and materials to ensure optimal results. Essential tools typically include:
- Resin Injector: Central to the repair process, this tool injects the resin into the chip.
- Repair Resin: A specialized adhesive designed to bond with the glass and provide structural integrity.
- Razor Blades: Used for cleaning and scraping away excess resin post-application.
- UV Light or Curing Lamp: Essential to cure the resin once it has been applied, ensuring a strong bond.
- Vacuum Pump: Sometimes, a vacuum pump can be used to help remove air bubbles from the chip before sealing.
Step-by-Step Guide to Chip Repair
Preparing the Area for Repair
The first step in any chip repair is to adequately prepare the area. This involves thoroughly cleaning the windshield around the chip using glass cleaner and a microfiber cloth. It is essential to ensure that no dirt or debris can contaminate the repair area, as this can affect the adhesion of the resin. Ensure the windshield is dry before proceeding, as moisture can also hinder the repair process.
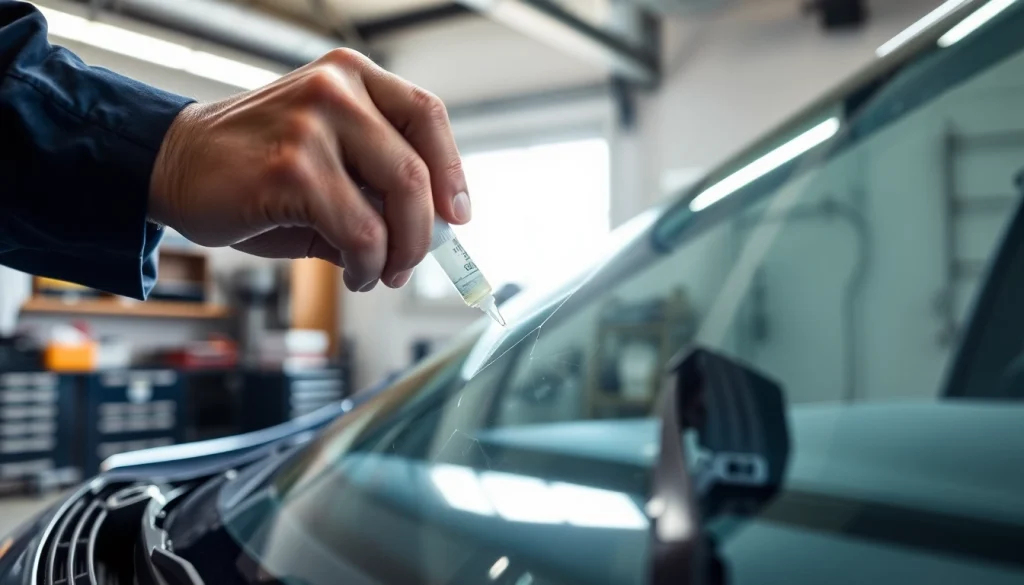
Applying the Repair Resin
Once the preparation is complete, the next step is to apply the repair resin. Using the resin injector, carefully place the injector over the chip and fully depress the plunger to inject the resin into the damage. Make sure to fill the chip completely to eliminate any air bubbles. Additionally, it may require several applications to adequately fill larger chips or complex fractures.
Curing and Finishing Touches
After the resin has been applied, it is time to cure it. Depending on the type of resin used, you may need to expose the repair to UV light for a specified period. Once cured, the excess resin should be scraped off with a razor blade to ensure a smooth finish. For optimal results, a final inspection is critical to ensure that the repair is clear, leaving no distortion that could interfere with the driver’s visibility.
Post-Repair Care and Maintenance
Best Practices After Chip Repair
After a chip repair has been completed, certain best practices should be followed to maintain the integrity of the repair. Avoid washing the windshield for at least 24 hours to allow the resin to fully cure. Additionally, refrain from driving on rough roads that may jostle the repair in its initial curing phase. If any minor imperfections are observed after repair, contact a professional for further evaluation.
When to Seek Professional Help
If you notice that the chip has expanded or appears to be worsening, it is essential to seek professional help as soon as possible. Certain scenarios also warrant professional assistance, such as chips located directly in the driver’s line of sight or on the edges of the windshield where structural integrity is critical. Experts have advanced techniques and equipment to ensure high-quality repairs that meet safety standards.
Tips for Preventing Future Chips
Preventing future windshield chips involves taking several proactive measures. Consider installing a protective film on your windshield, which can absorb impacts from debris. Additionally, maintain safe following distances when driving to mitigate the risk of debris from other vehicles. Regular inspections of your windshield can also help catch any potential weaknesses before they result in chips.
Evaluating the Effectiveness of Chip Repair
Performance Metrics for Chip Repairs
Evaluating the effectiveness of a chip repair involves several performance metrics. Key indicators include the clarity of the repaired area, the strength of the resin bond, and whether any distortion remains post-repair. A successful repair will not significantly obstruct the driver’s view and will maintain the structural integrity of the windshield. Regular follow-up assessments can help determine the longevity of the repair.
When Repairing Beats Replacing
Understanding when to repair versus when to replace a windshield is crucial for vehicle owners. Generally, if a chip is under a specific size (often a quarter) and located away from the edges, a repair is advisable. This approach not only saves costs but also preserves the original windshield, which can be essential for maintaining the vehicle’s resale value.
Customer Satisfaction and Chip Repair Outcomes
Customer satisfaction plays a pivotal role in the success of chip repair services. Surveys and feedback mechanisms can provide insights into customer experiences, helping to refine repair techniques and service quality. A high rate of customer satisfaction often correlates with a high success rate of repairs, emphasizing the importance of skilled technicians and quality materials in the chip repair process.